(This blog post was originally written for www.stuartkellynz.com he’s a cool guy, you should go visit him some time)
I’ve been flipping my classroom for a couple of years now. Over that time I’ve taught about 400 different students and made around 700 videos. I’ve made more mistakes than I care to mention and learned a lot in the process.
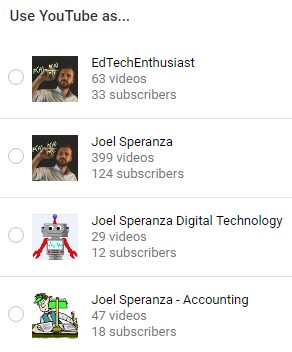 These are just the public videos!
I remember the absolutely uncertainty when I was just getting started. So many questions. What will I do in class? What if they don’t do the homework? What if I make a mistake?
These are the same questions I had when I was starting out as a “traditional teacher” as well. How did I get the answers? By jumping right in the deep end and giving it a go!
So here is my step-by-step guide to the first week of flipping your classroom. Jump in and see how you go.
Step 1. Talk to your students about it
Explain the concept of flipped learning to your students. Tell them why you’d like to try it. Tell them what you think the benefits of flipped learning are. Maybe you could show them this video in class so they have an idea of what to expect. Answer their questions.
Perhaps, more importantly, ask them questions. How long do they think a video should be? How much homework should they do each night? What should we do if they don’t watch the videos? What should we spend our time in class doing? Take their ideas on board and try to implement them.
Give your class ownership of their own flipped learning class and they’ll surprise you.
Step 2. Make a week’s worth of videos
Now a lot of people will tell you that flipped classrooms are not about making videos. I agree. But that doesn’t change the fact that the most unfamiliar aspect of this entire Flipped Classroom journey is going to be making videos.
By making a week’s worth of videos in a single sitting you’ll save yourself a lot of time. The hard part of making a movie (even in Hollywood) is getting set up. The bit where the camera is rolling is the easy bit.
These videos don’t need to be works of art. (you can watch my first flipped classroom video here) You’re not trying to win an Oscar here. All you need to do is convey enough knowledge that when the students come into class they can start applying it.
Couple of tips though…
- Don’t try to be perfect.
- Teach Fast.
- Make the video Short.
The easiest way to get started with making a video is probably using screencastomatic. Screencastomatic will capture video of your computer screen, webcam or both.
Step 3. Watch the video together in class
Learning from a video is a new concept for these students (although I’m sure they’ve learnt from youtube before!) It’s important that you teach them “how” to watch your videos. Put the video up on the projector and watch it as a class.
Should they take notes while they are watching the video? When is the right time to pause the videos? Should we rewind the video? When, Why? Doing this together is a great class activity and models metacognition. Students start thinking about their learning process and that is a great thing.
 Popcorn is for cinemas – Watching these videos is different!
Step 4. Do an engaging class activity
Let’s be honest. As full-time teachers not every one of our classes is an absolute show-stopper. Sometimes we throw together an “ok” lesson. That’s absolutely fine and we shouldn’t feel bad about that.
But when we’re introducing our flipped classroom, it’s time to put our game face on and put together something a bit special. Something that shows your students that you’re really putting the effort in and the flipped classroom is going to be something good for them.
Don’t worry, not every lesson will need to be a killer but we should try to put our best foot forward here.
Step 5. Video Homework and an email home
Talk again about the flipped classroom concept. Talk about how long the video is, how they should take notes. Sell them on how their homework is now a predictable length of time and much shorter than conventional homework. Put your salesman hat on. The more people that watch this video the better!
Tonight is also a good night to send an email home to parents explaining the flipped classroom concept and asking them to ensure their son/daughter watches the video for homework. They might even watch it too. The more allies you have in flipping your classroom the better.
Step 6. Be ready for anything
This class will be an interesting one and it’s where flipped classrooms really come into their own. Your students will fall into three “fuzzy” categories:
- Watched the video and understood it.
- Watched the video and they aren’t sure about it.
- Didn’t watch the video. (you’ll know since they didn’t take notes)
You’ll know which category they fall into because you’ll ask them. Where you go to from here really depends on your subject. It’s up to you now to differentiate your lesson. The great part though is that you have A WHOLE LESSON to do it in. No direct instruction today!
Step 7. End of the week. Ask for feedback.
At the end of the week, it’s very important that you ask your students for feedback. The flipped classroom belongs to them and they should feel they have a say in how it’s run. What worked? What didn’t? What can we improve upon?
A google form or survey monkey is a good way to do this but a handwritten note from each student will work just as well. Don’t overcomplicate it. 3 questions is enough.
- What did you like?
- What didn’t you like?
- How can we improve?
Once you’ve read their feedback, take it seriously, make adjustments and get ready for week two!
So there’s my 7 step program to surviving (and thriving!) in your first week of flipping your classroom. Not so bad, is it?