Just to pre-empt the inevitable question; No, I am not writing backwards.
That’s always the first question but I also get a lot of others about my lightboard. Hopefully I can answer a few here.
The building started after a good natured challenge was thrown down by Jeremy Lecornu at Flipcon Gold Coast 2015. Five days later I’d gathered all my materials, hastily threw my lightboard together and posted this.
Not exactly usable but I continued tinkering and playing with it, the lightboard moved from my spare room to a classroom in school and we’re now making videos that look more like this.
Watch the full video here instead.
So, how do you build one? Quite easily as it turns out. Before you start though, Here’s what you’ll end up with.
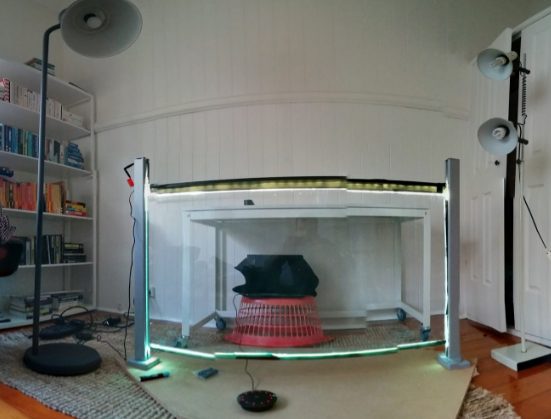
I know it doesn’t look like much, but the video you’re looking at above was recorded on that exact piece of equipment (only difference was where it was)
Parts
- MDF Board (longer than 1200mm, width of 600mm or above will do) (um… $20?) (later on I created a proper set of legs for it, your carpentry skills will vary)
- Glass (1200mm x 760mm x 12mm((starphire is the best) (cost me $120 from an aquarium builder but any glazier knows what starphire is)
- pool fencing legs from bunnings. ($100 for the pair)
- Strip LEDs, (you need them to have a dimmer attached) (I paid $100 but I think I overpaid)
- Duct tape. (actually, tape that is black on both sides is better. Electrical tape should do it)
- Expo Neon markers. ($12)
Extra Computer stuff.
- logitech c920 camera. (this webcam does “mirroring”. That means the image gets reversed, so I don’t have to write backwards.
- Blue Yeti microphone
- Screencastomatic, the full version costs $15 a year. software
Method:
- Bolt your pool fence legs to the MDF or whatever base you chose.
- Put the glass in between the pool fence legs. (I hope you measured twice!)
- Put LED strip along the top of the glass facing into the glass and tape it down
- Put black tape along the bottom of your glass to stop light escaping and you’re done.
Filming
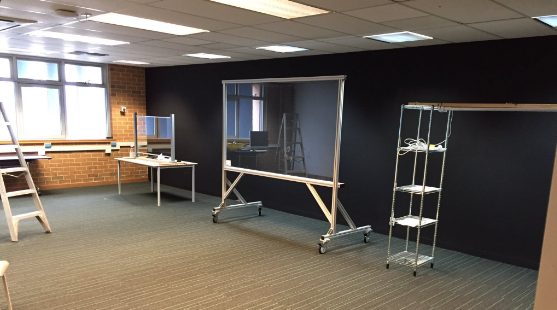
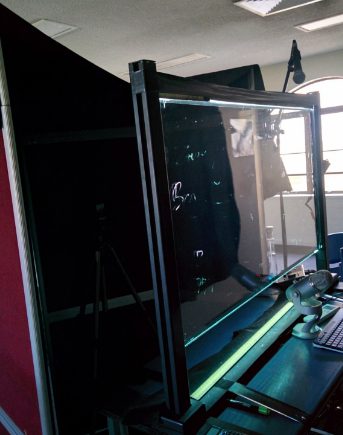 Film in a really really well lit room. Most people make the mistake of thinking darkness. That’s wrong. Instead, all surfaces around the lightboard should be black. This will kill all those pesky reflections. Here’s how the lightboard “filming booth” currently looks in the school.
You’ll also want to dim your LEDs so that the writing still “pops”, but also so that the colour doesn’t get lost. Too bright and every little smudge shows up in your video, too dim and the writing is hard to see.
Lightboard Mark 2
When it came time to build our second our second lightboard we did things a tiny bit differently.
You can actually buy mobile glass boards straight off the shelf. We bought ours here.
Off the Shelf clear glass board
This works quite well, although the glass is not as transparent as the starphire I used in the original build. This leads to the LEDs not penetrating evenly through the glass. This is still a workable solution and we’re quite happy with the result.
If you’d like a third option, Our friend Jeremy Lecornu of Brighton Secondary school in SA made a massive one after first making the small one in my tutorial. (small one on the left, large on the right)
He used these plans and had it built by a company called 80/20 http://www.8020.com.au/
Be aware that this is not a budget solution but, as you can see, it gives you a very professional product!
Of course, we were not the first to build lightboards
I first came across the lightboard at this website. My opinion on that particular lightboard setup is that, in a busy school, the requirements for post production and lighting setup etc are just too costly and time consuming.
4 comments